


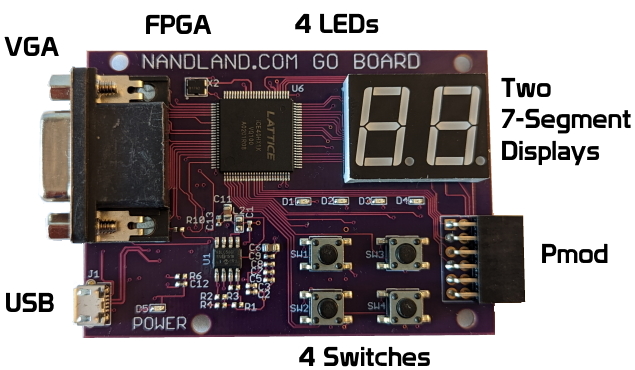
The Go Board
The Best FPGA Development Board For Beginners
If you have never used an FPGA board before, this is absolutely the first board that you should purchase. Order One Now for just $70. Thanks to a successful Kickstarter campaign which raised over $10,000, the Go Board is available to purchase!
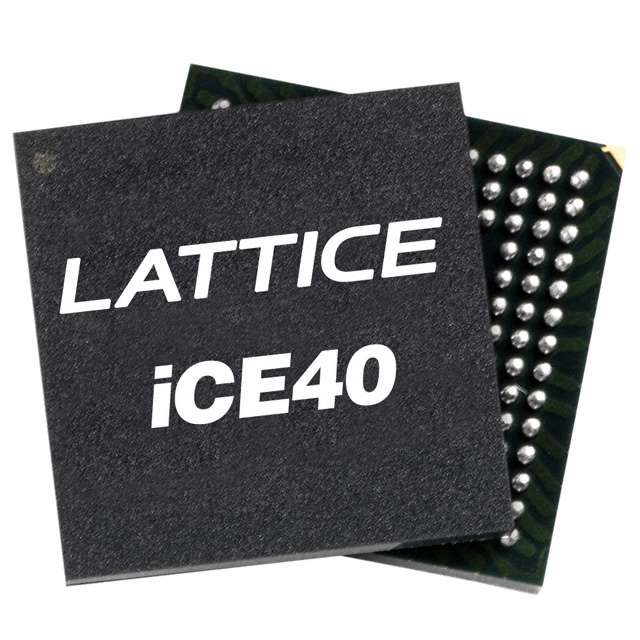
The Lattice ICE40 FPGA
The Lattice ICE40 FPGA series is an excellent choice for beginners. It provides you with a powerful FPGA that strikes a balance between capability and ease-of-use. The 1K in its name refers to the 1280 Logic Cells inside the part. These can be used as Look-Up Tables (LUTs) in your code. This many Logic Cells will be enough to do all sorts of projects. Another great benefit is that the open source project IceStorm has been created around this FPGA. This means if you want to write Verilog and synthesize your code using all open source build tools you can! This is the first time an FPGA has had an open source toolchain available for it. Note that you will need either Windows or Linux to build your FPGA projects.

USB Connection
One major reason why this board is so great for beginners is how easy it is to use. The USB Connector allows you to Power, Program, and Communicate with the board, all via one simple connection! When you plug the Go Board into your computer the USB powers it, no external power brick is required! Additionally, the computer will automatically detect that a board has been connected and you can program your FPGA. Finally, for projects involving a UART this same connector can be used to communicate with the FPGA via a your computer keyboard. I will show you how this is done.
LEDs, Switches, 7-Segments
There are four Light Emitting Diodes (LEDs) on the Go Board, which allow you a quick check to see some diagnostic information about the board. The first project will show how to make these blink by connecting each of the four switches to each LED. The switches and LEDs can be re-purposed by your code. That’s what makes FPGAs so great: you can reprogram them to do anything you want. 7-Segment Displays are very useful for displaying information to a user, so I put two 7-Segment displays on the Go Board. These are used everywhere in electronics and they’re fun.
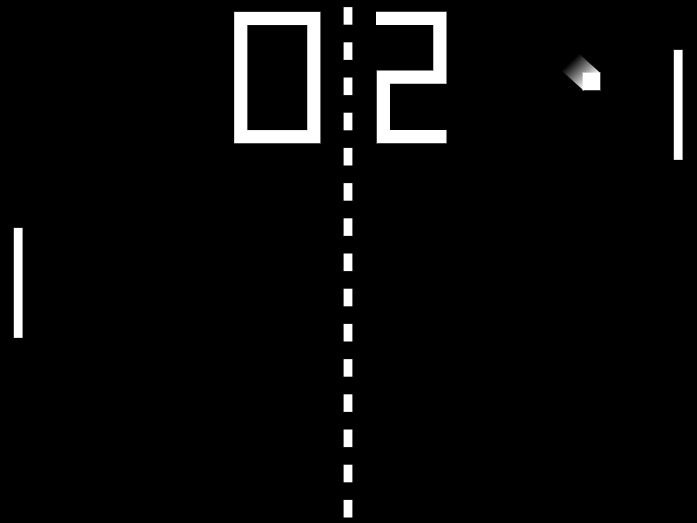
VGA Connector
I’m very excited about having a VGA connector on this board. VGA is a very simple interface compared to DVI or HDMI, but simple is good! With the Go Board you’ll be able to create all sorts of VGA projects, even Pong! These projects are fun and complicated, so you’ll be using what you learned with the simpler projects to do the VGA projects. There are only a few other FPGA boards on the market that offer this connector built right in, and the majority of these boards are more expensive. I realized that the best way to learn how to use FPGAs is to enable you to have many types of projects available to you, without having to solder stuff or use a breadboard. VGA is fun!
PMOD and Other Features
The PMOD connector is a connector interface created by Digilent Inc. I chose to use this connector on the Go Board because Digilent offers a huge number of PMOD Peripheral Modules. These can add a ton of functionality to the Go Board. If you want to try out creating your own I2C or SPI interfaces you can do that! Or if you want to interface to an LCD screen, or whatever you want! For example, I created an I2C Interface for the Kickstarter Video to interface to a temperature sensor board on that list. It’s a great way to add any functionality that you want for not too much money. The other features on the Go Board are a 25 MHz on-board oscillator. This will be used as the main clock in your FPGA designs. Additionally, there’s a 1 Mb Flash for booting your FPGA. Don’t worry if you don’t know what this means yet, we will get there!
So many lessons out of the box
| Lesson | Lesson Description | YouTube Video |
|---|---|---|
| Setup your Environment | Get setup with the tools you need to program the Go Board. |  |
| Project 1 – Switches and LEDs | Push buttons, blink LEDs. Learn the basics of how an FPGA can be programmed to take user input and light up! | 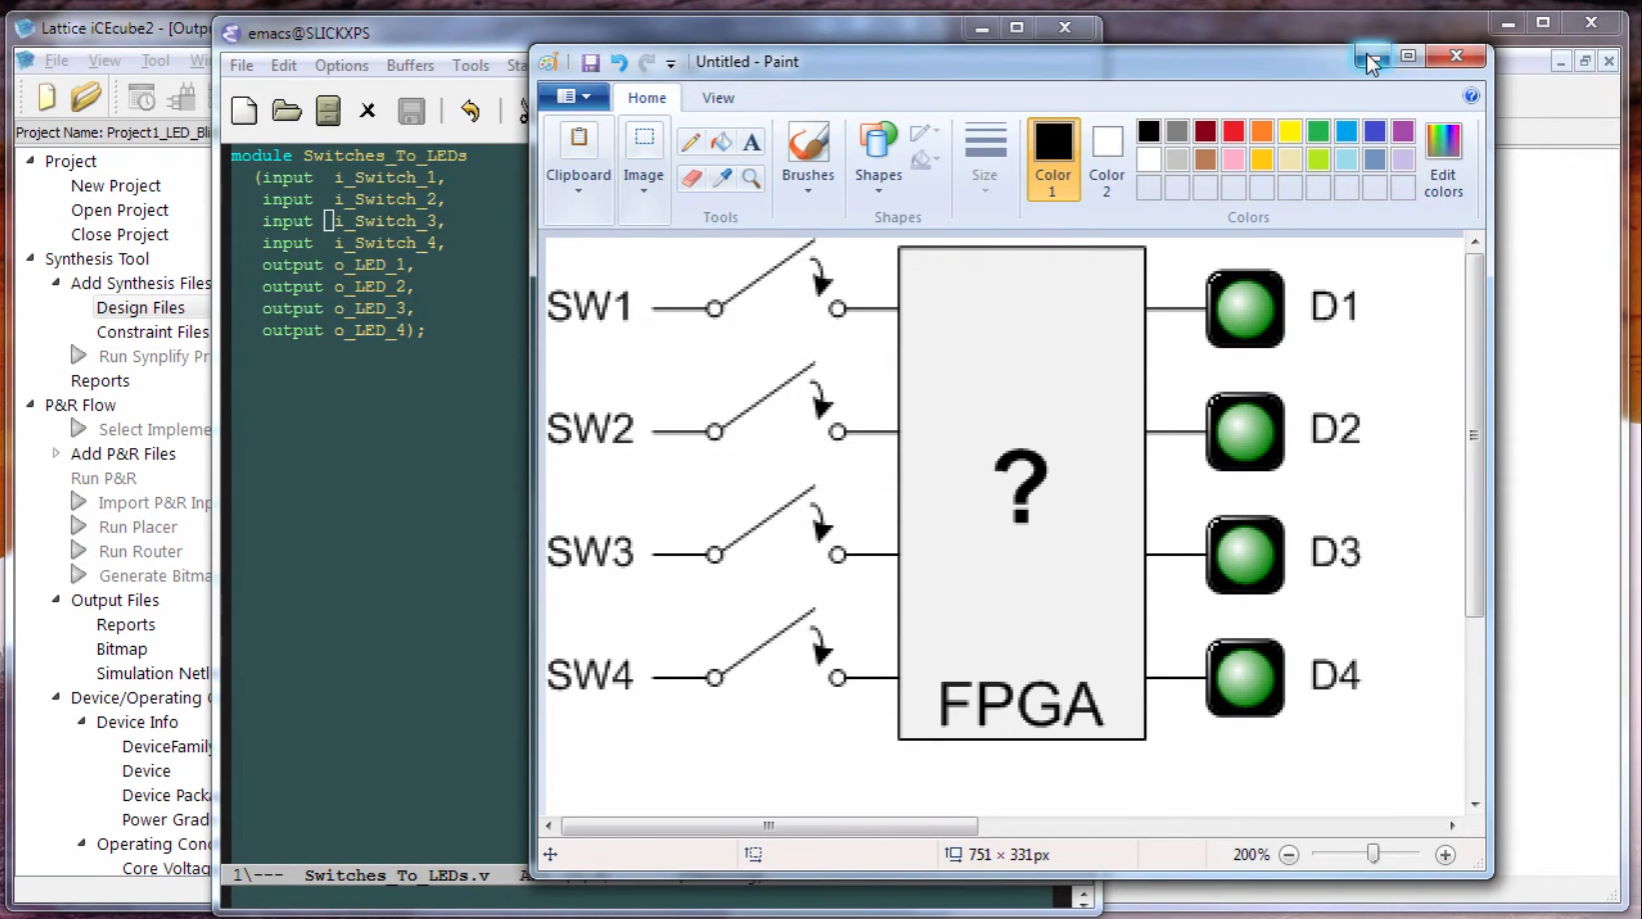 |
| Project 2 – The Look-up Table (LUT) | Learn about one of the two most fundamental components within an FPGA: The Look-Up Table (LUT). See how Boolean algebra works inside your FPGA. Learn about AND, NOT, OR, XOR logic gates. | 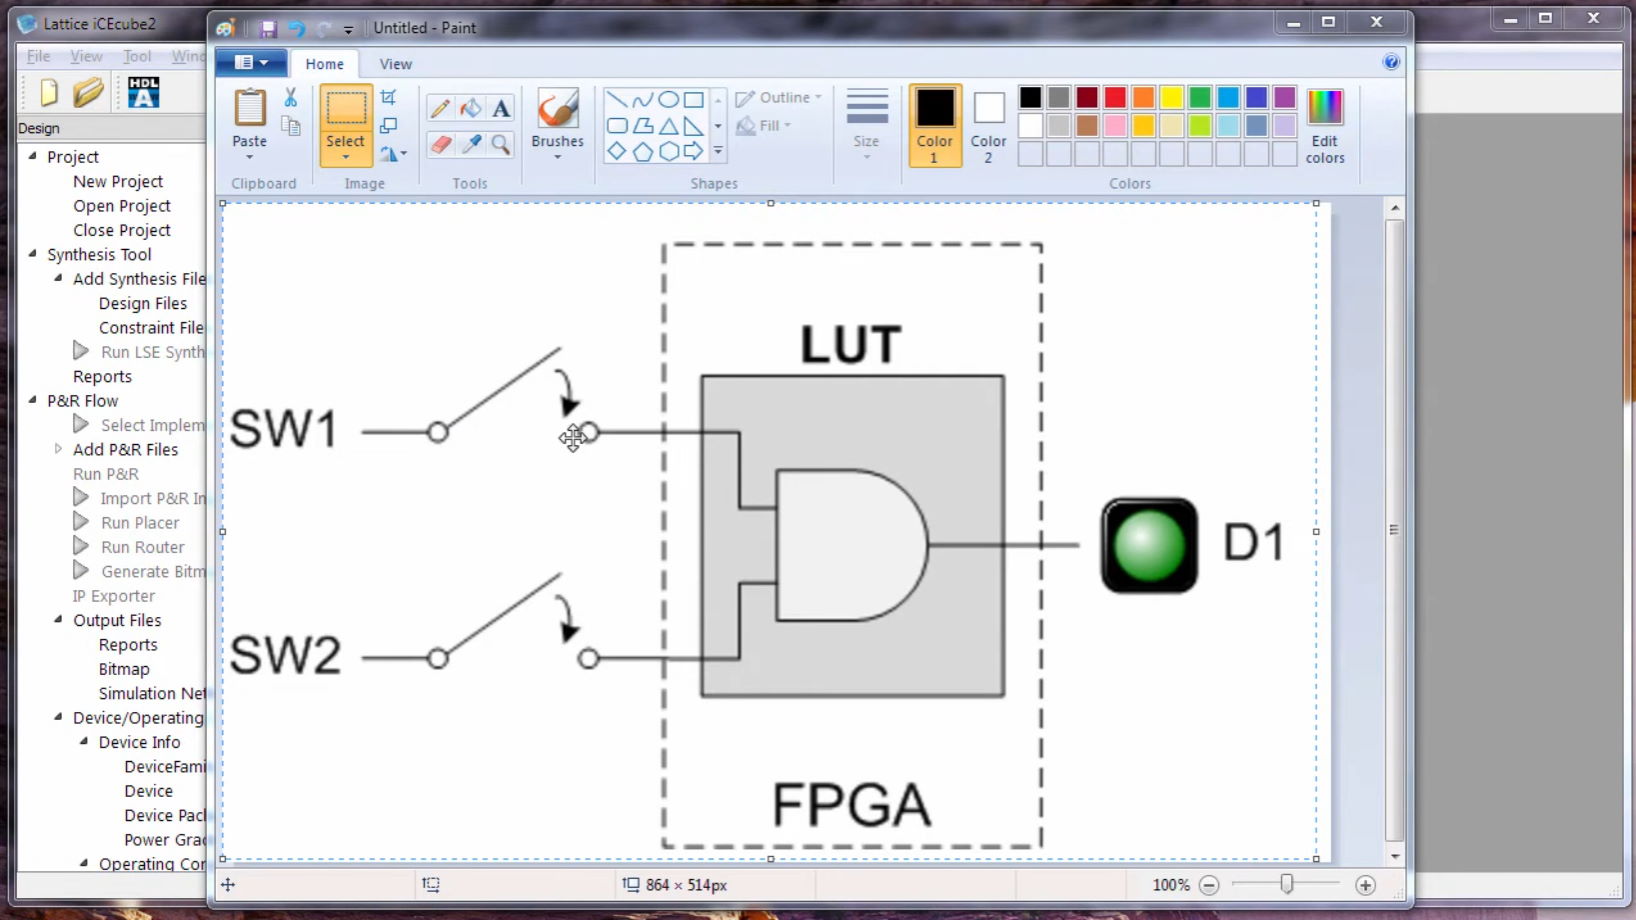 |
| Project 3 – The Flip-Flop | Learn about the second most fundamental component within an FPGA: The Flip-Flop (or register). The flip-flop is critical to how the FPGA stores “state” or remembers. It is how we can keep track of time within the FPGA. | 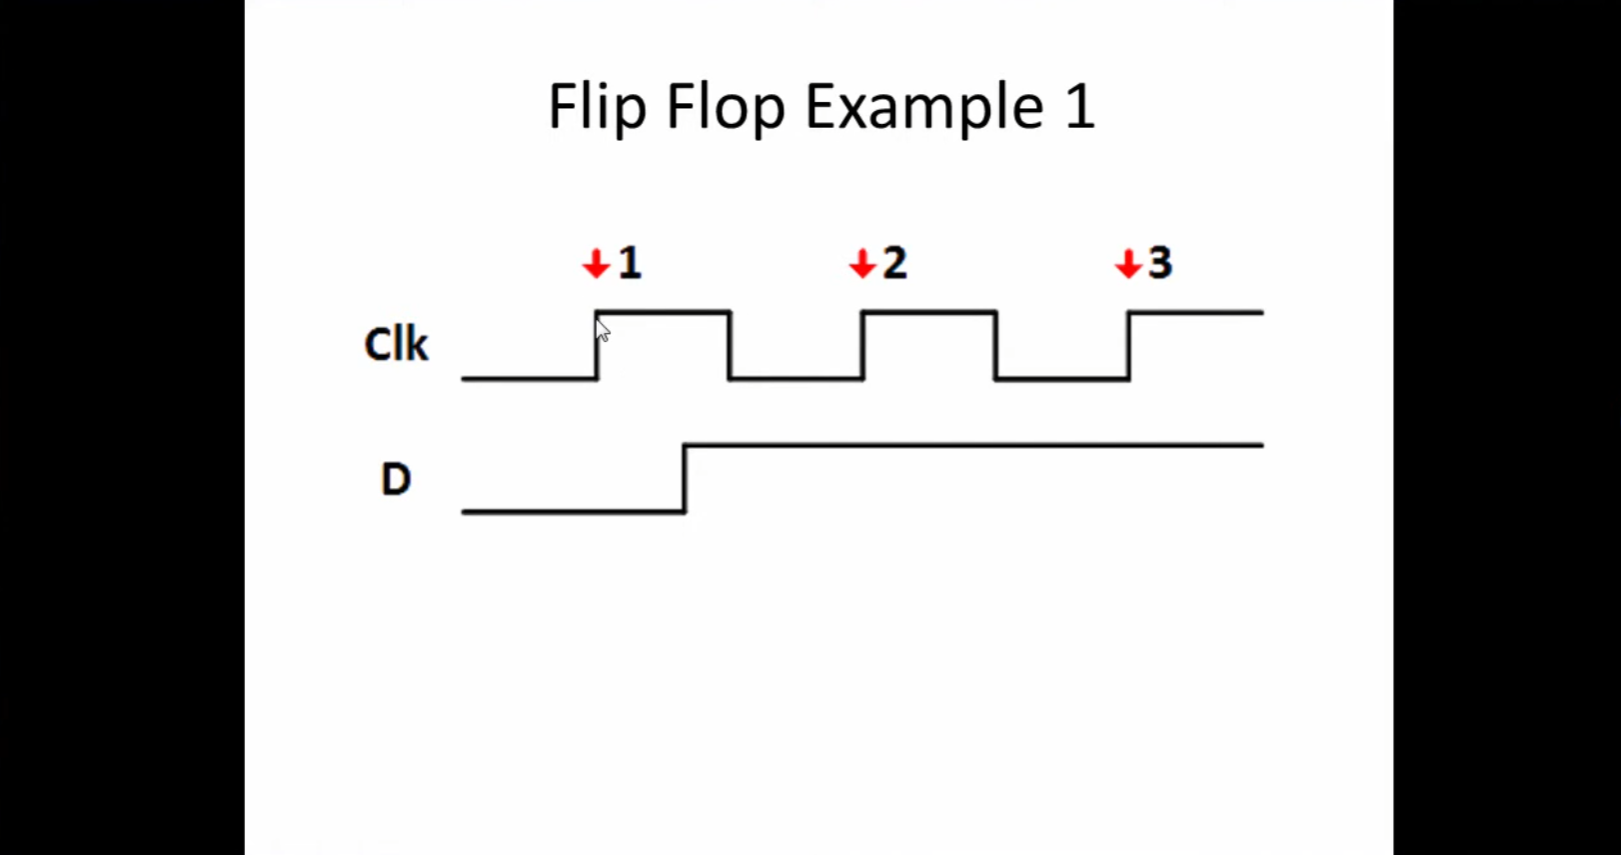 |
| Project 4 – Debounce a Switch | Switches on the Go Board are subject to glitches or bouncing. This project creates a simple debounce filter using LUTs and Flip-Flops to remove the glitches. Builds on what we’ve learned in Projects 2 and 3. | 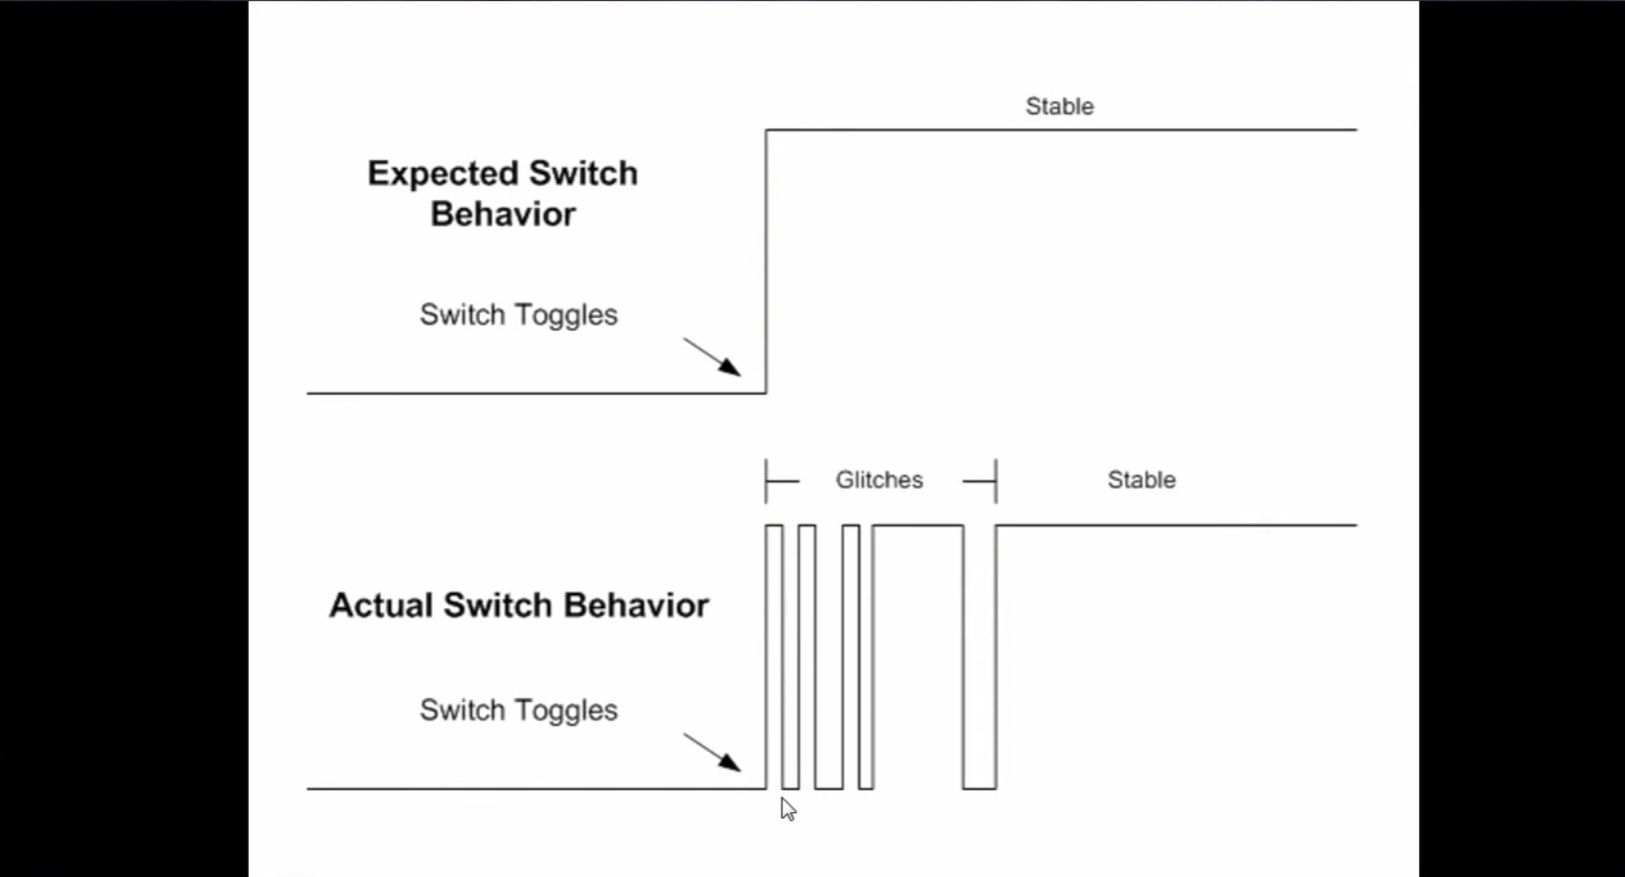 |
| Project 5 – Seven Segment Display | Seven segment displays are used everywhere to display simple numbers. See how you can write code to drive the two digit 7-segment displays on the Go Board to show information easily. | 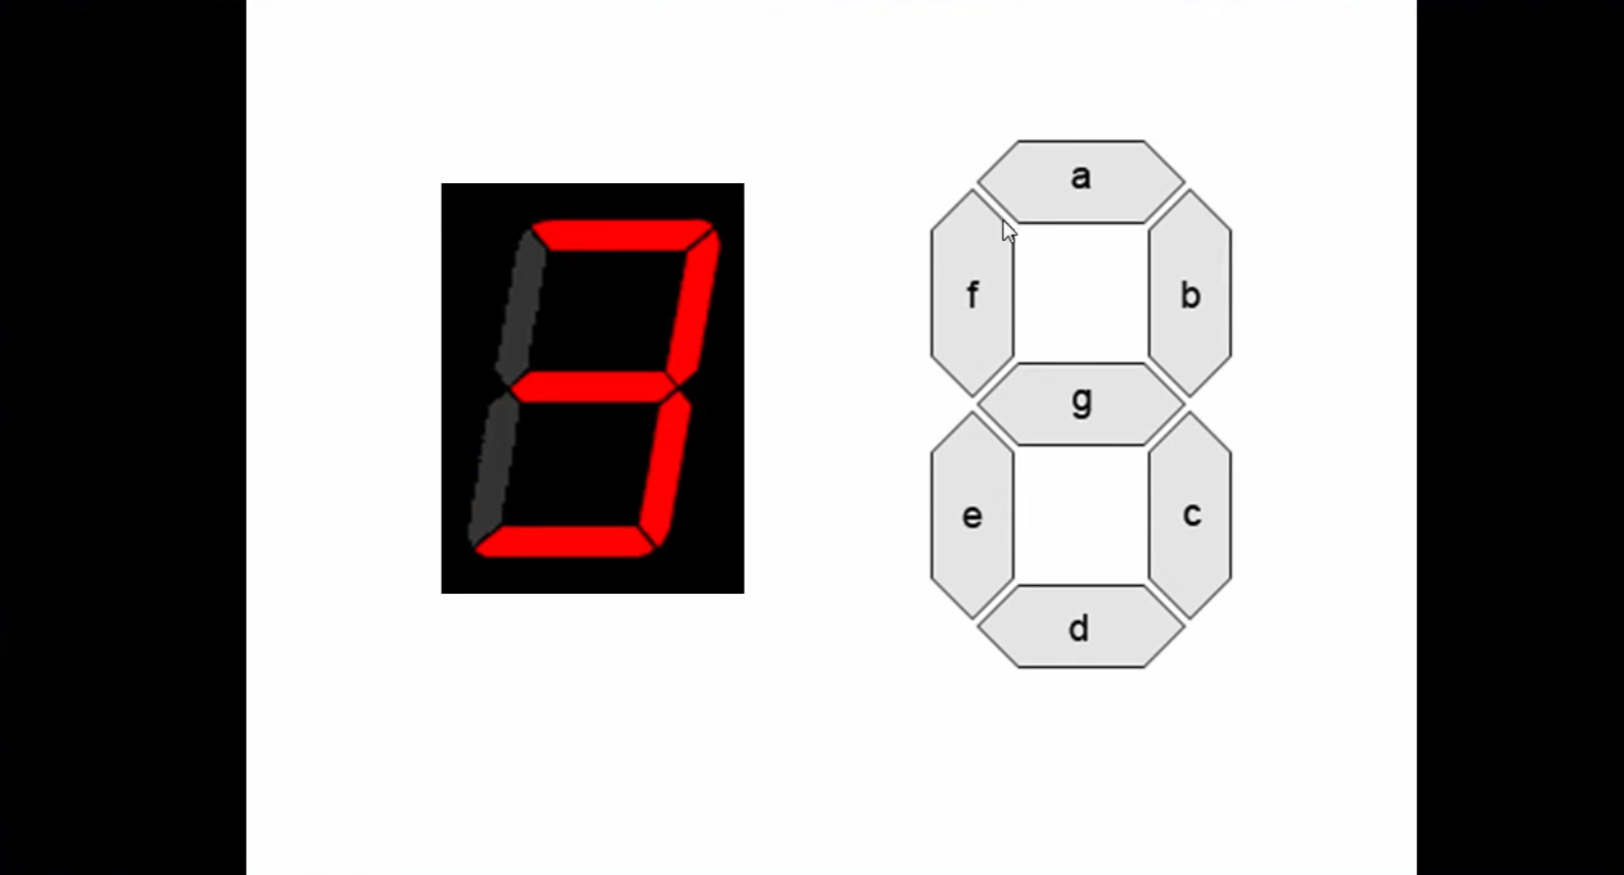 |
| Project 6 – Simulation | Simulation is a critical process of looking into the details of what’s going on inside your FPGA. We can visually see every single signal inside the complex device at any instant in time. | 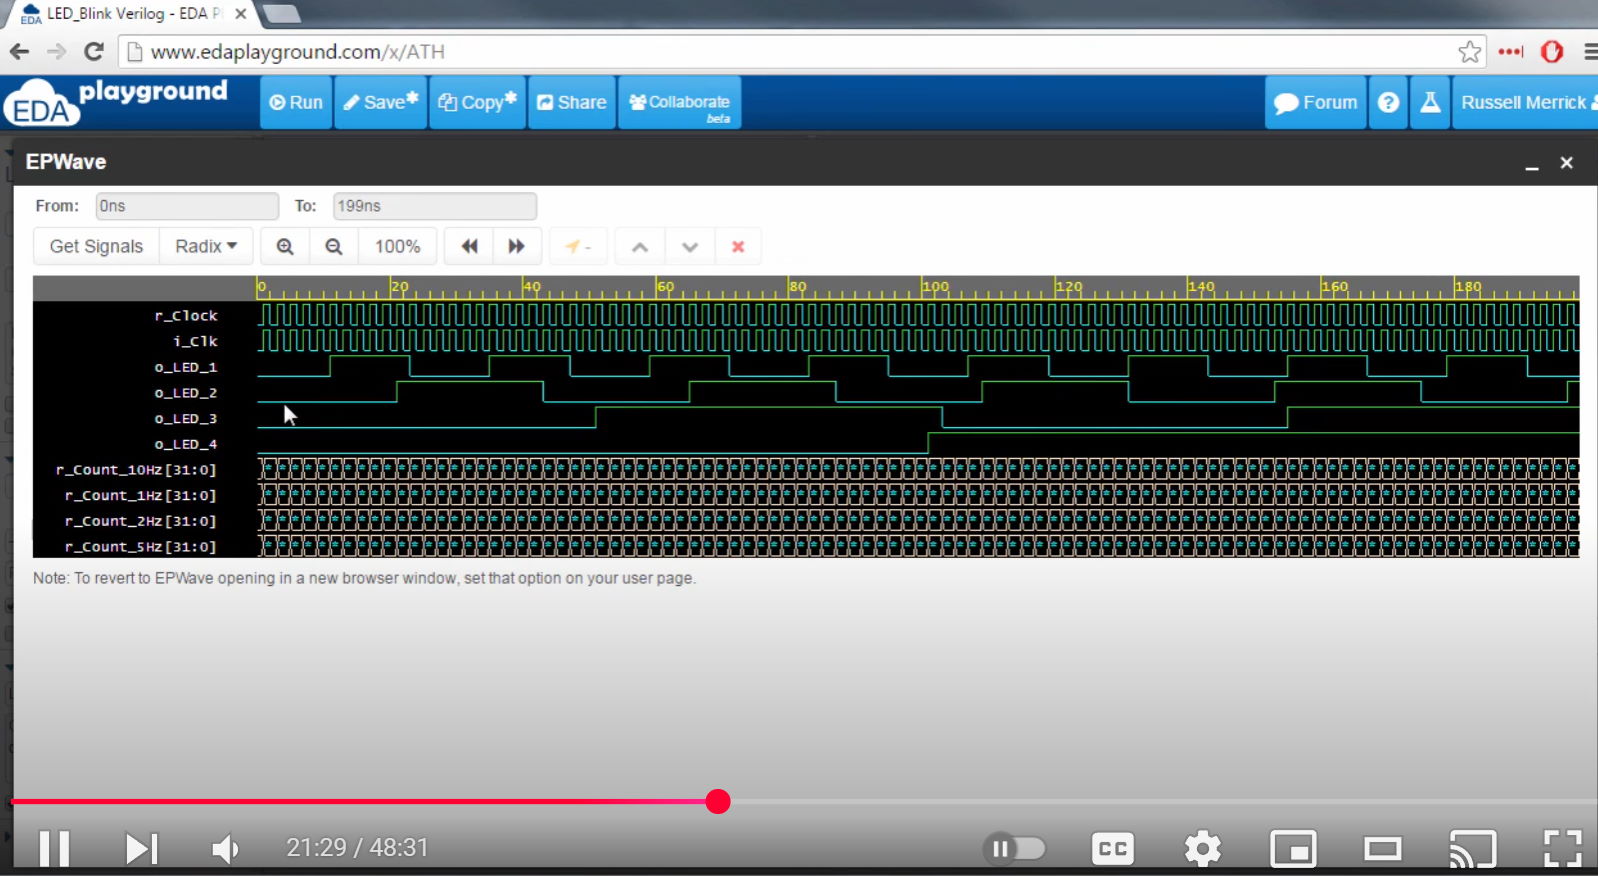 |
| Project 7 – UART Receiver | Part 1 – Receive data from a computer with a UART, the simplest type of communication interface. Allows you to send data to your FPGA by typing into your keyboard. | 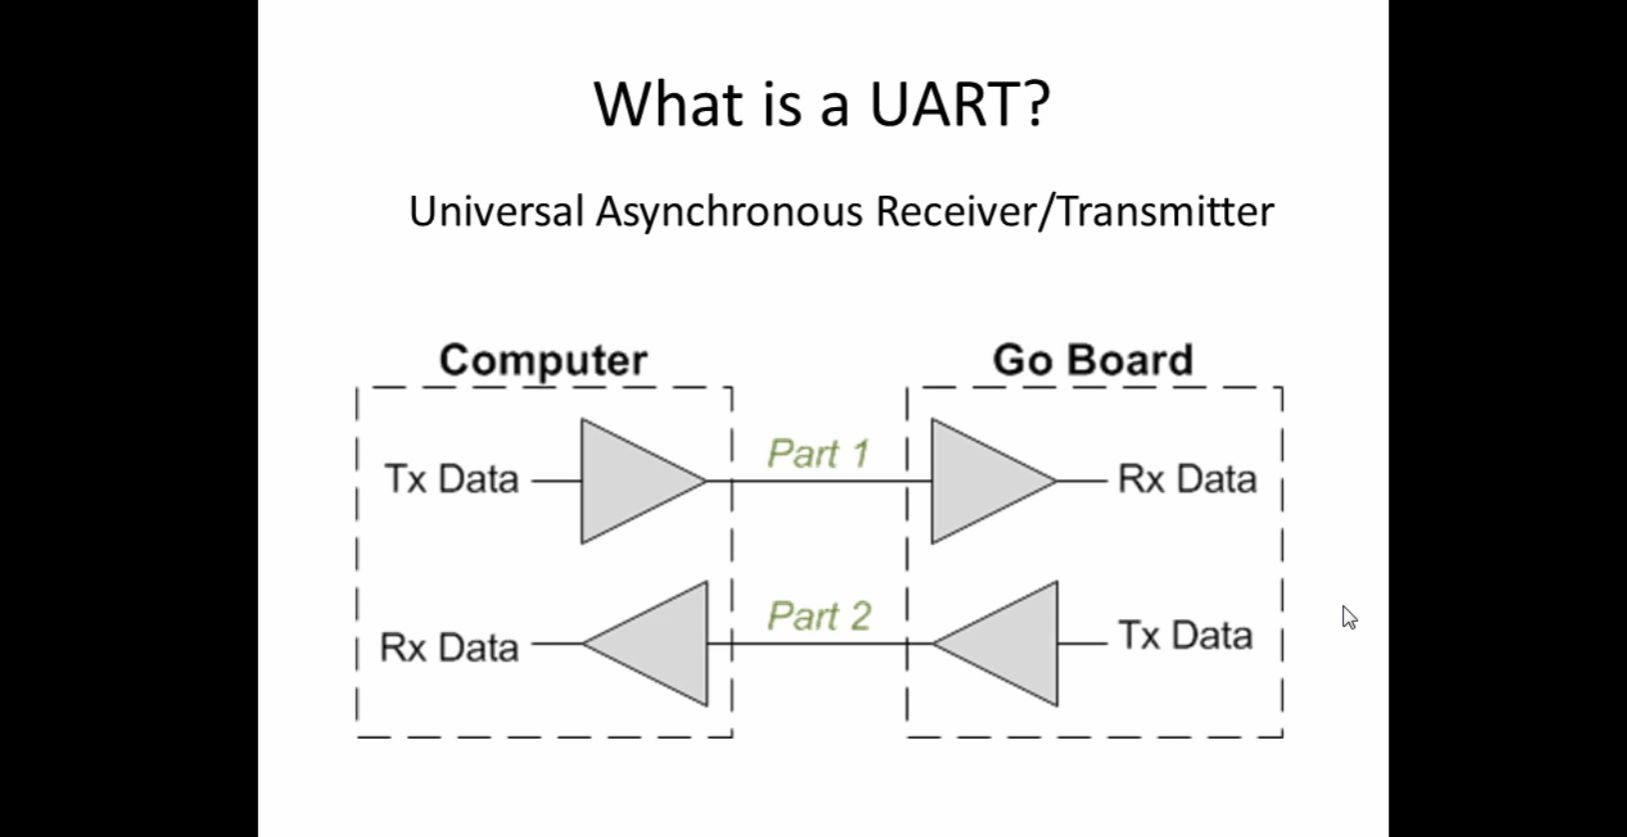 |
| Project 8 – UART Transmitter | Part 2 – Transmit data from your FPGA to your computer with UART. Allows the computer to send and receive data from your FPGA. | |
| Project 9 – VGA Introduction | VGA is a display interface that predated HDMI. It’s a simple interface that allows the Go Board to send image data to any monitor. Learn the basics of how it works. | 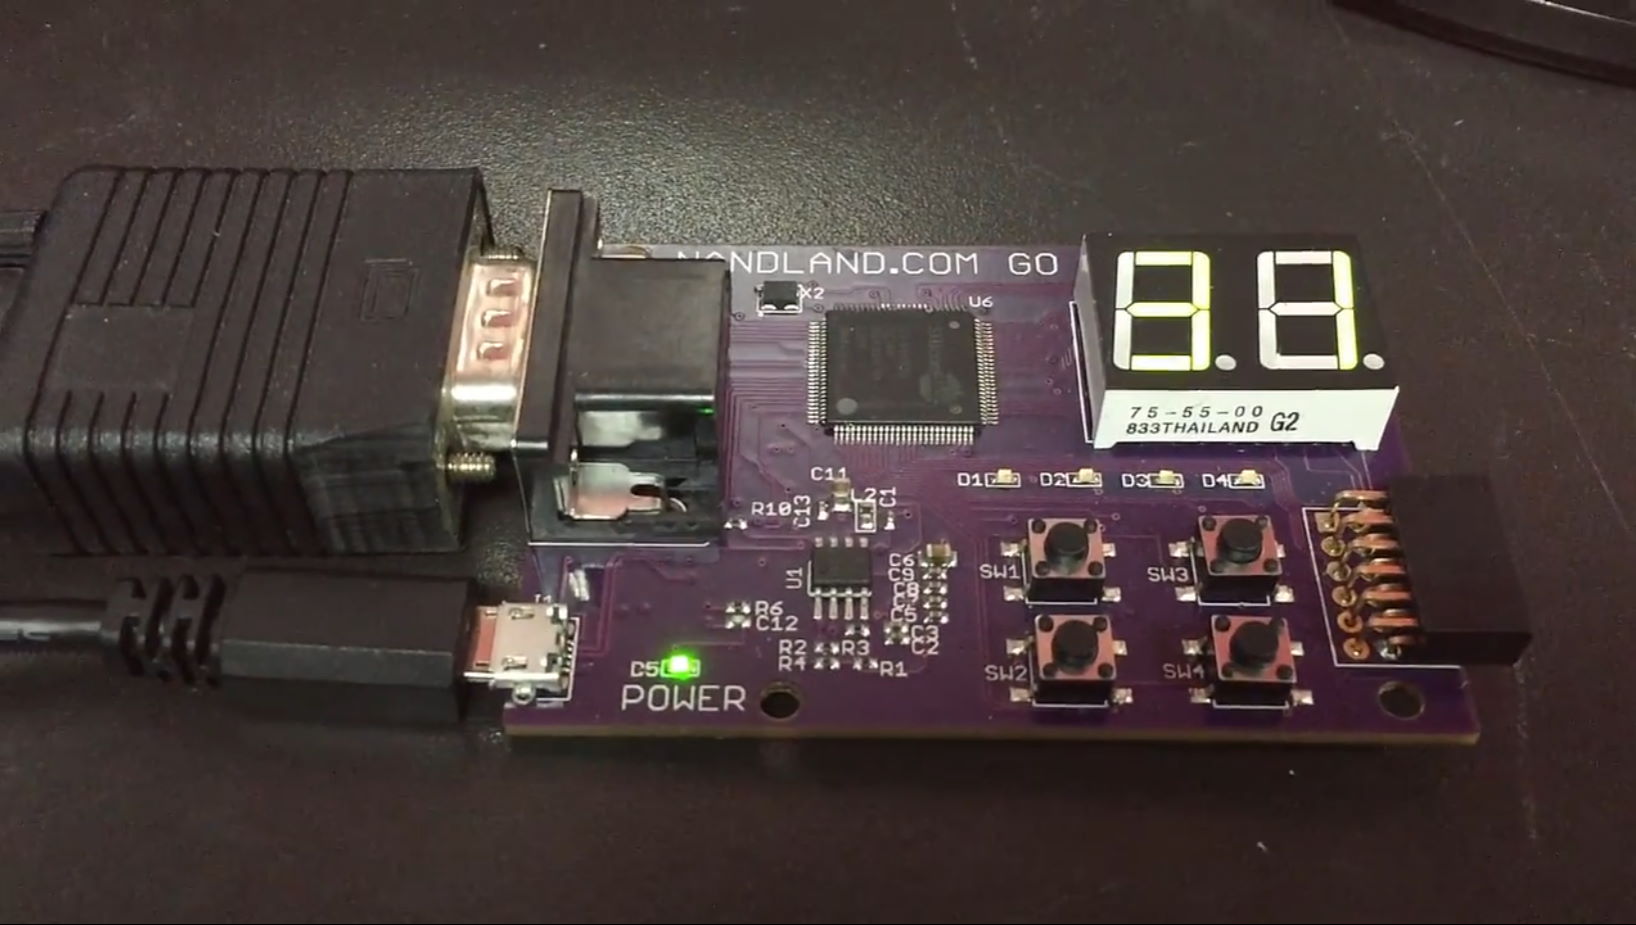
|
| Project 10 – PONG | Play the classic arcade game PONG using the Go Board! The buttons control the paddles and the game is played on a monitor using the VGA port. Combines everything we’ve learned into a very fun project! | 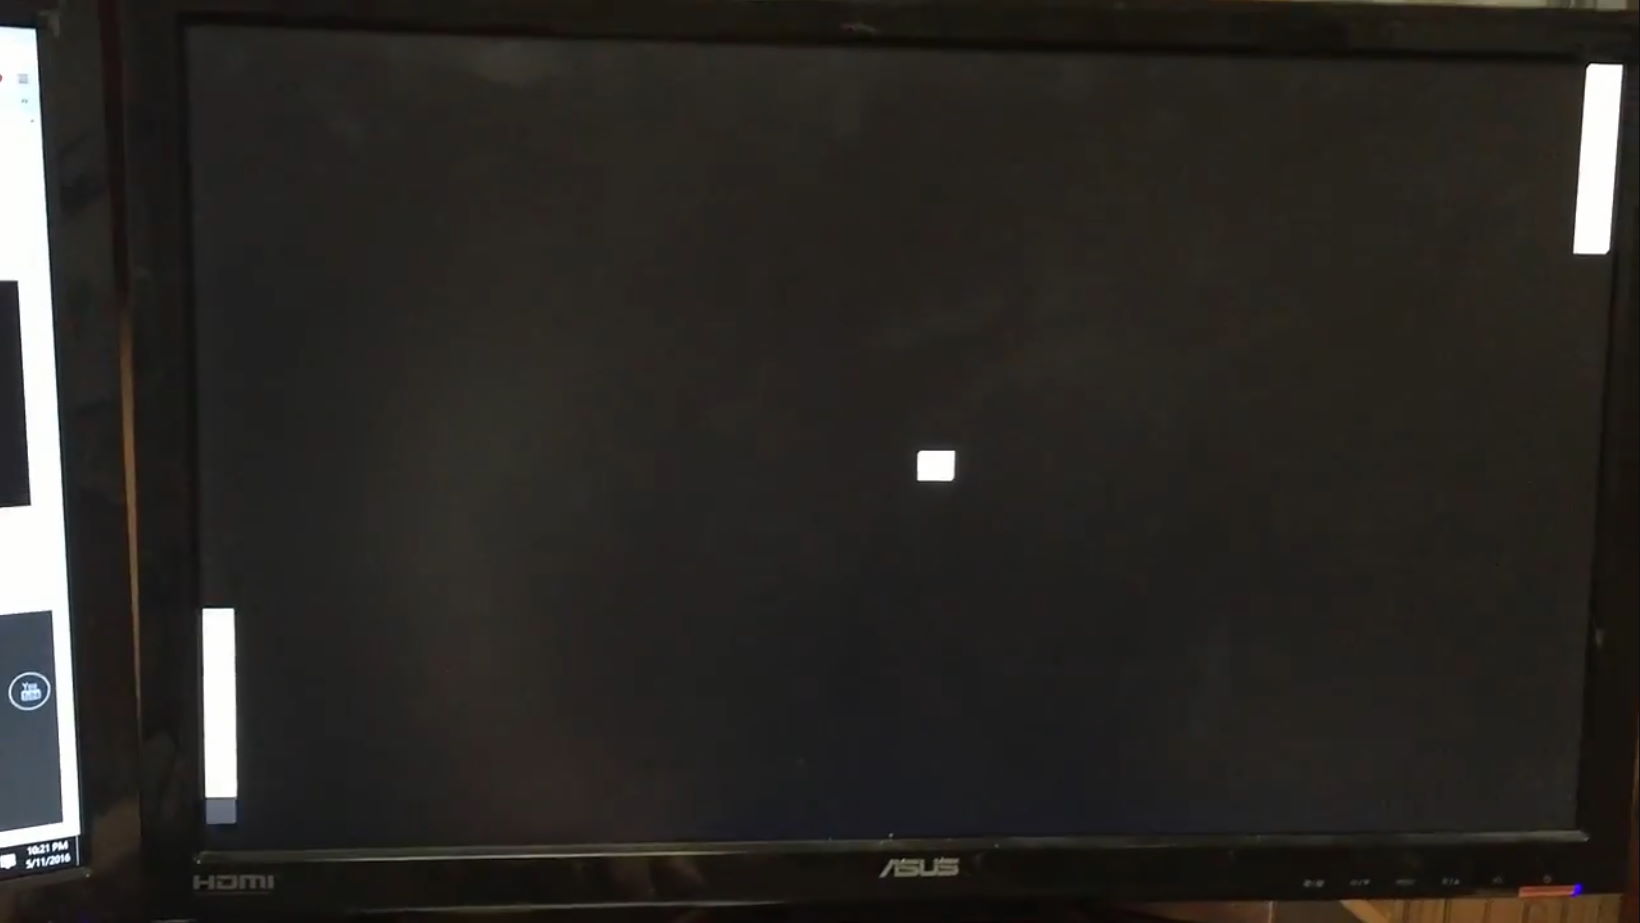 |
Let’s Get Started!
If you don’t yet have a Go Board, you can Order One Now. If you already do have a board, then let’s get started. First things first, you need to download ICEcube2 from Lattice so you can build and program your FPGAs. Let’s get started!