The Go Board
I’m thrilled you’re here! It’s my goal to make learning about FPGAs as enjoyable an experience as possible. I hope you find the tutorials and videos helpful. I highly recommend going through them in order, as they build on each other. Feel free to bookmark this page as a reference to come back to.
I Just Received a Go Board, Where Do I Begin?
First things first, let’s make sure the Go Board was not damaged in shipping. Get a Micro-USB cable and plug in the Go Board. You should see the PWR LED illuminate immediately. Push the 4 buttons, you should see LEDs toggling, as well as the 7-Segment Display. If that looks good, you’re good to go! Let’s get started learning.
Watch this YouTube Video if you just received your Go Board
| Lesson | Lesson Description | YouTube Video |
|---|---|---|
| Setup your Environment | Get setup with the tools you need to program the Go Board. |  |
| Project 1 – Switches and LEDs | Push buttons, blink LEDs. Learn the basics of how an FPGA can be programmed to take user input and light up! | 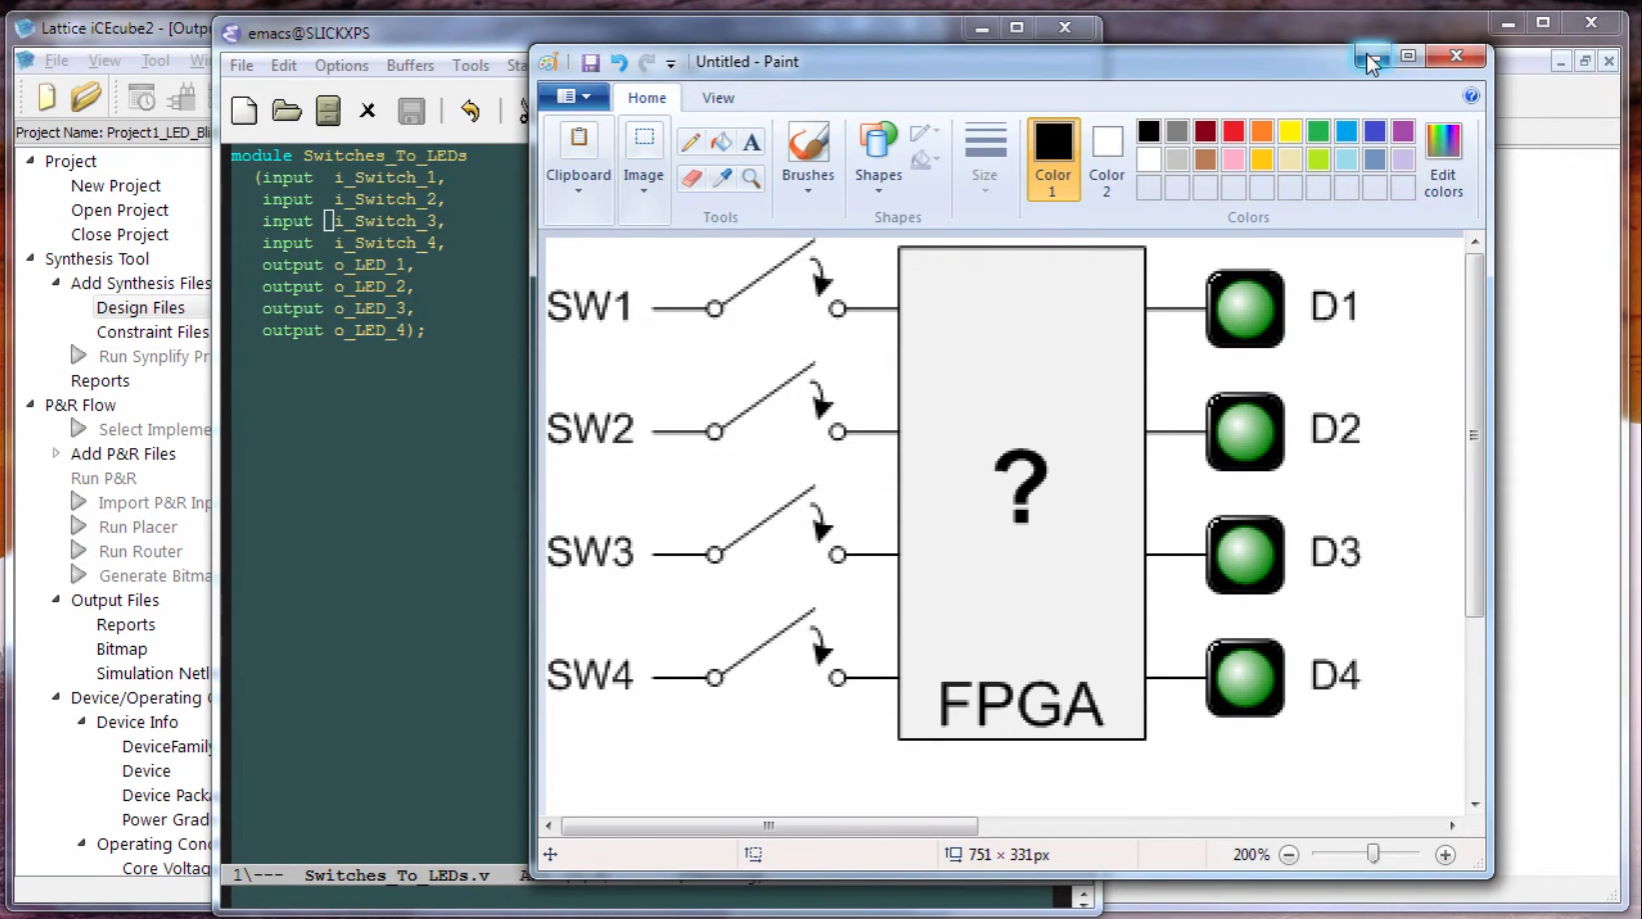 |
| Project 2 – The Look-up Table (LUT) | Learn about one of the two most fundamental components within an FPGA: The Look-Up Table (LUT). See how Boolean algebra works inside your FPGA. Learn about AND, NOT, OR, XOR logic gates. | 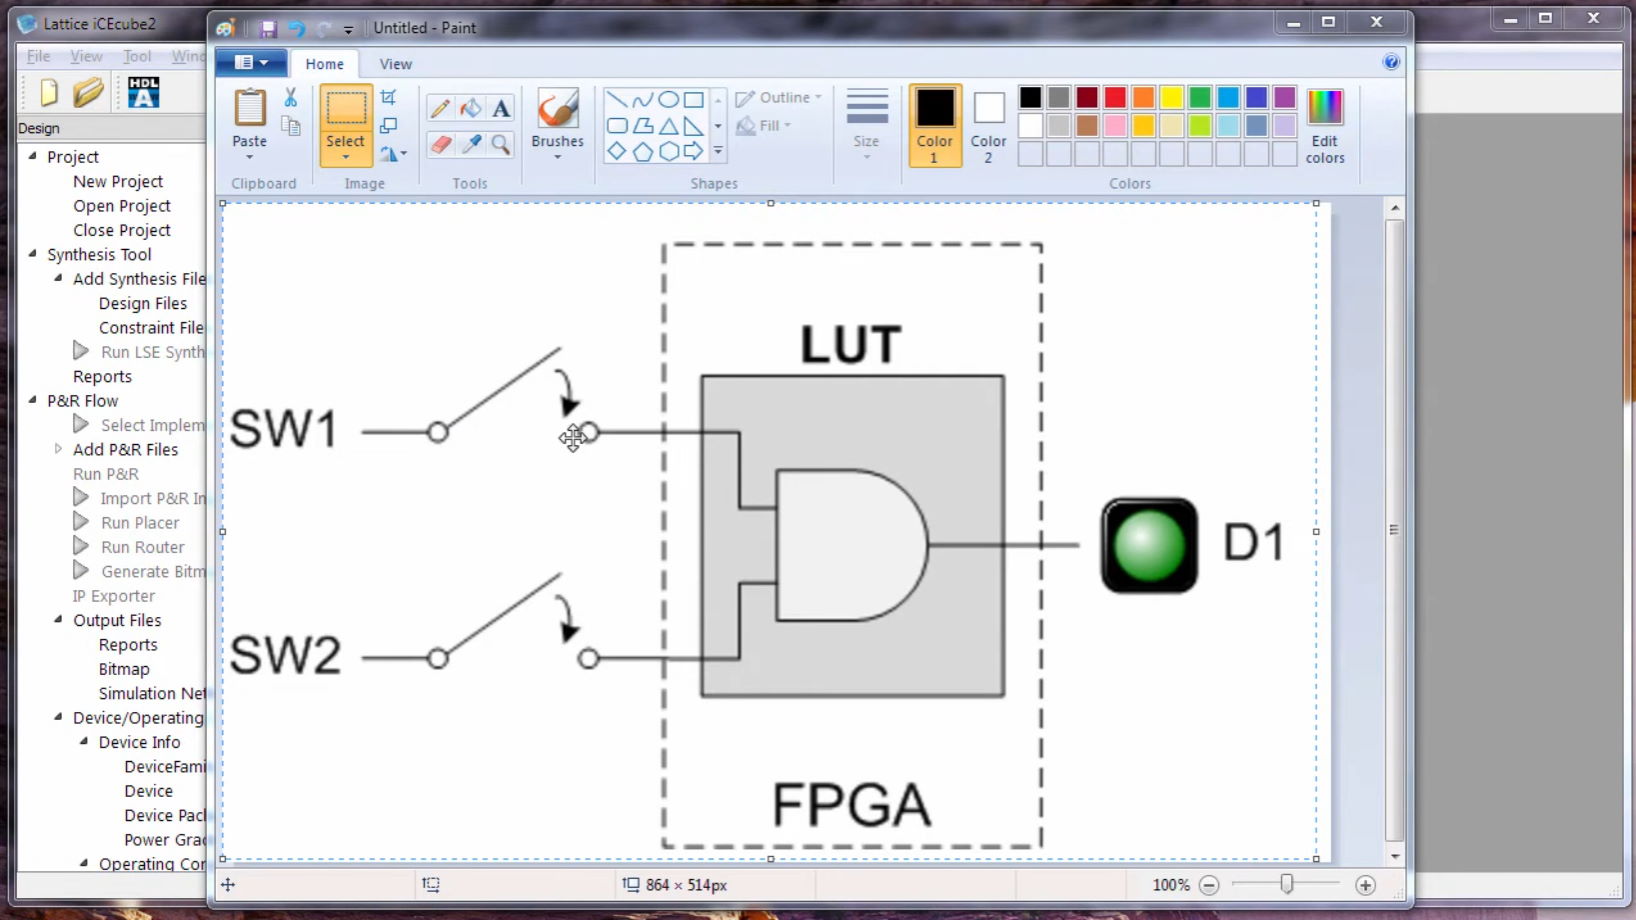 |
| Project 3 – The Flip-Flop | Learn about the second most fundamental component within an FPGA: The Flip-Flop (or register). The flip-flop is critical to how the FPGA stores “state” or remembers. It is how we can keep track of time within the FPGA. | 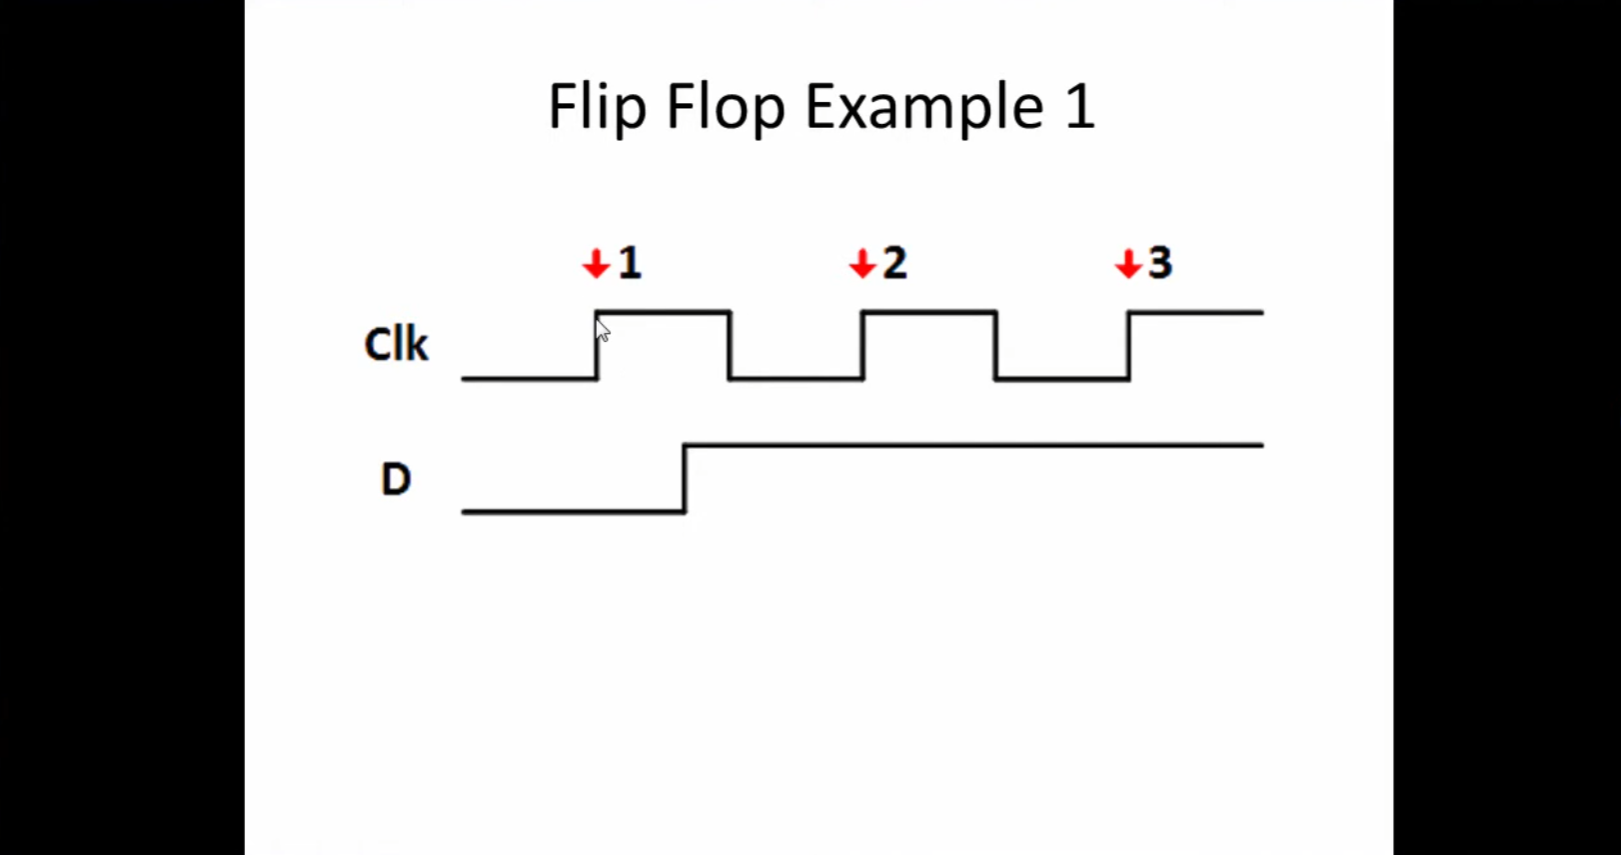 |
| Project 4 – Debounce a Switch | Switches on the Go Board are subject to glitches or bouncing. This project creates a simple debounce filter using LUTs and Flip-Flops to remove the glitches. Builds on what we’ve learned in Projects 2 and 3. | 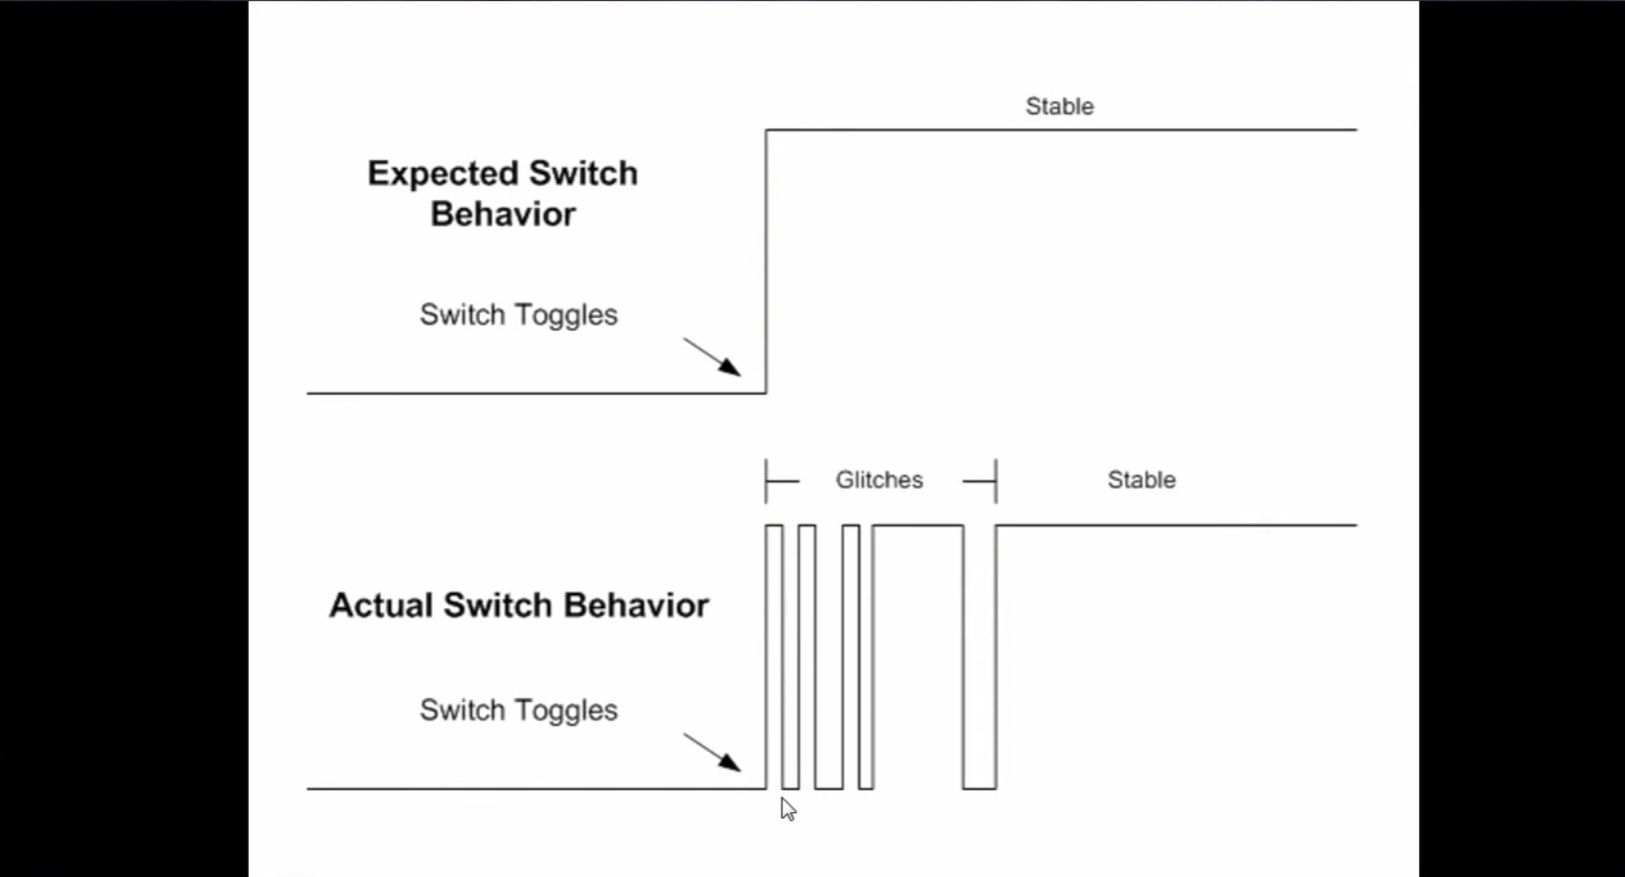 |
| Project 5 – Seven Segment Display | Seven segment displays are used everywhere to display simple numbers. See how you can write code to drive the two digit 7-segment displays on the Go Board to show information easily. | 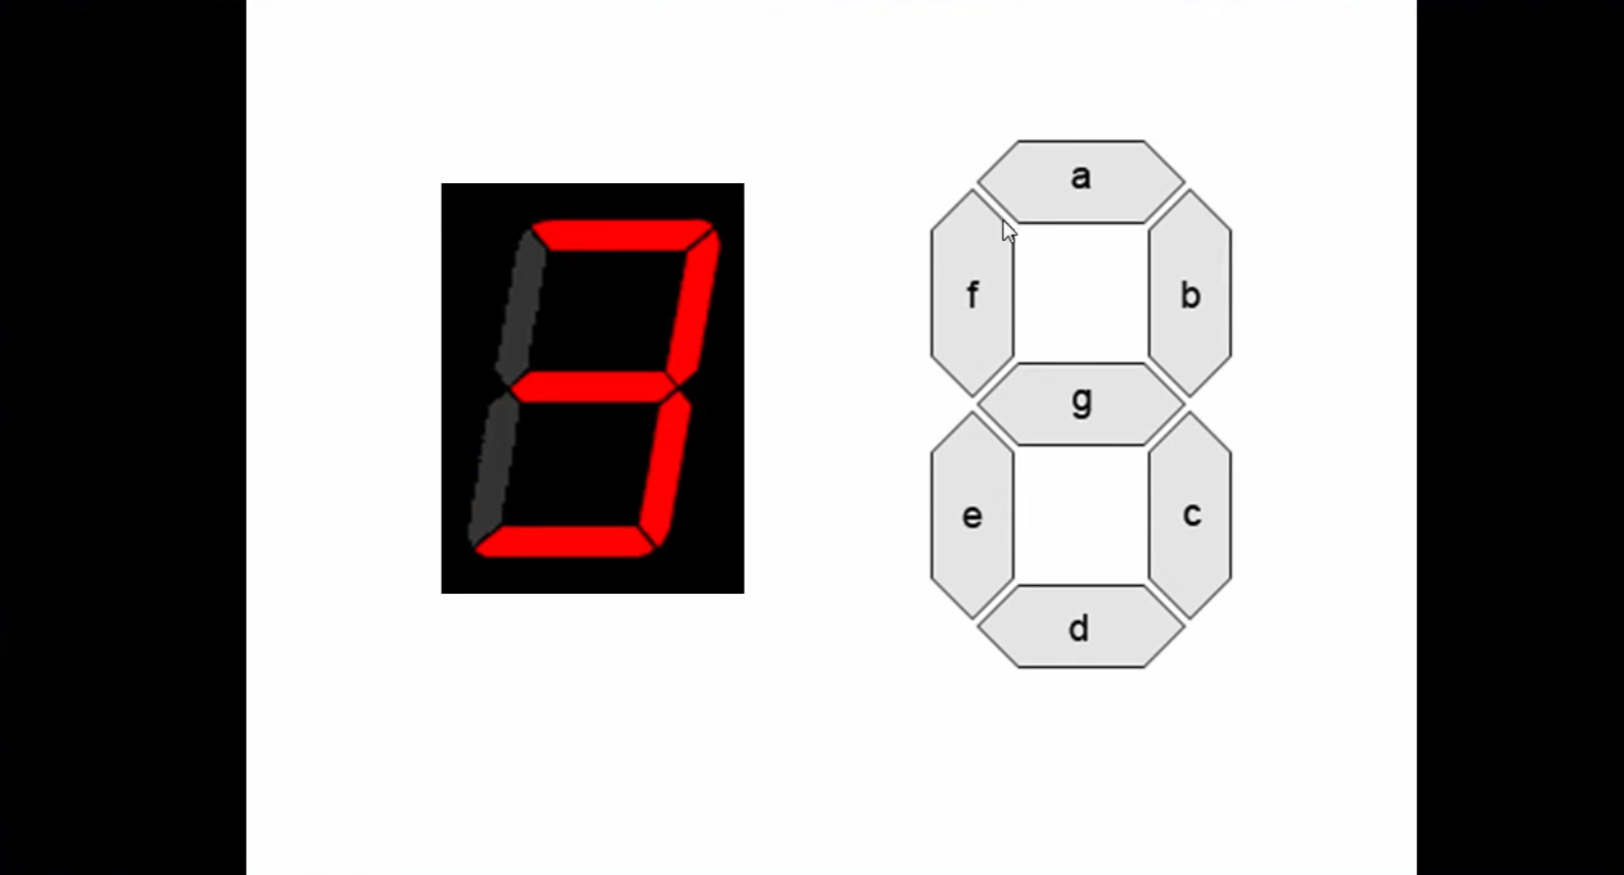 |
| Project 6 – Simulation | Simulation is a critical process of looking into the details of what’s going on inside your FPGA. We can visually see every single signal inside the complex device at any instant in time. | 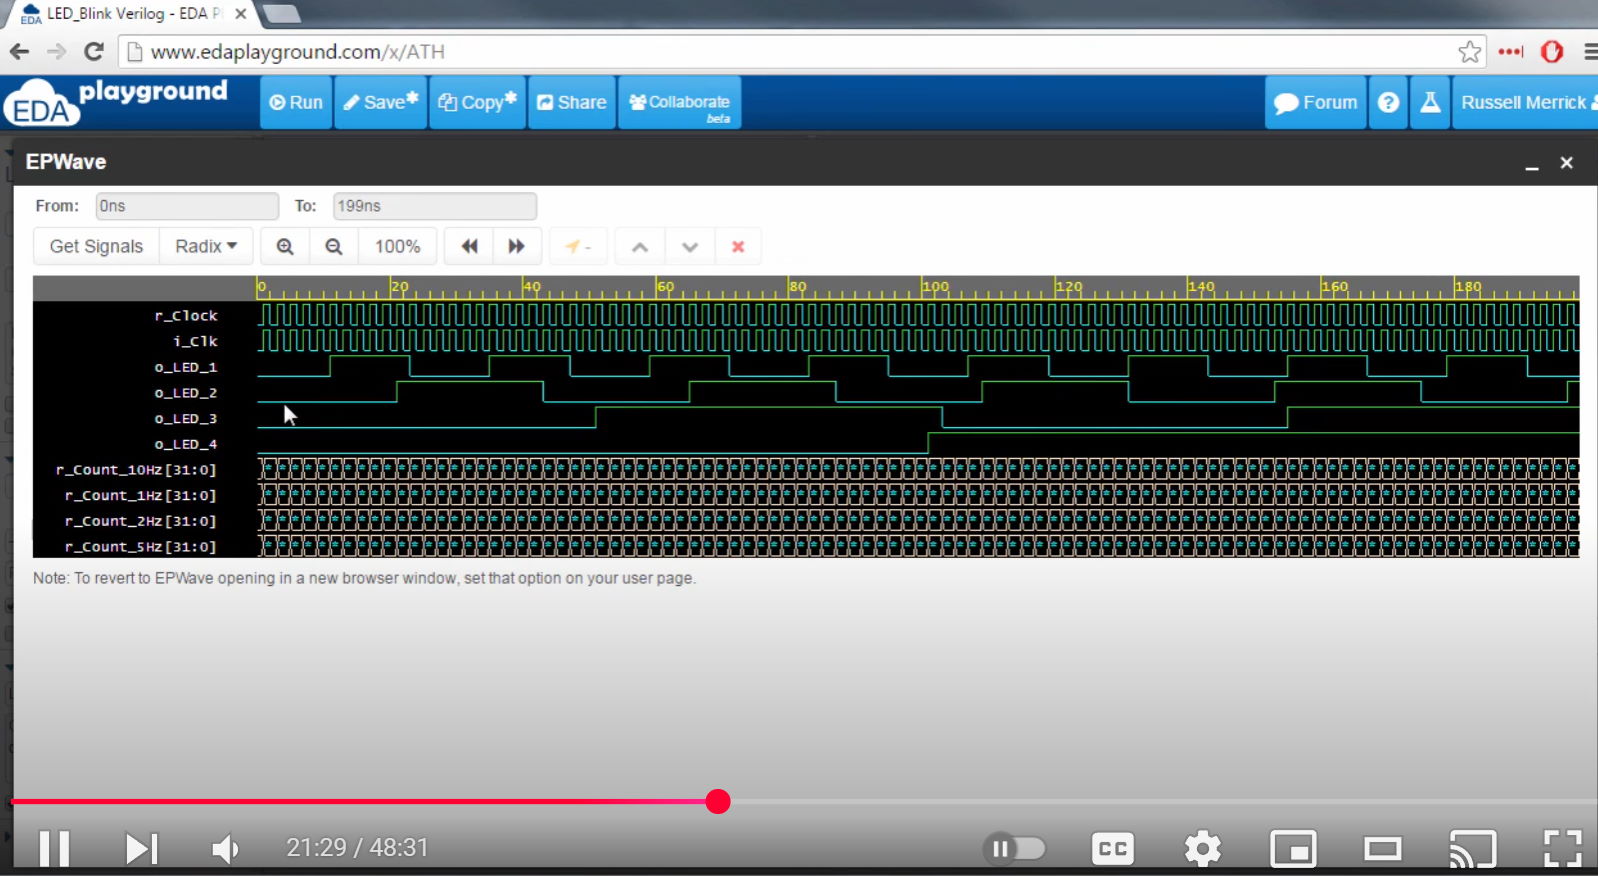 |
| Project 7 – UART Receiver | Part 1 – Receive data from a computer with a UART, the simplest type of communication interface. Allows you to send data to your FPGA by typing into your keyboard. | 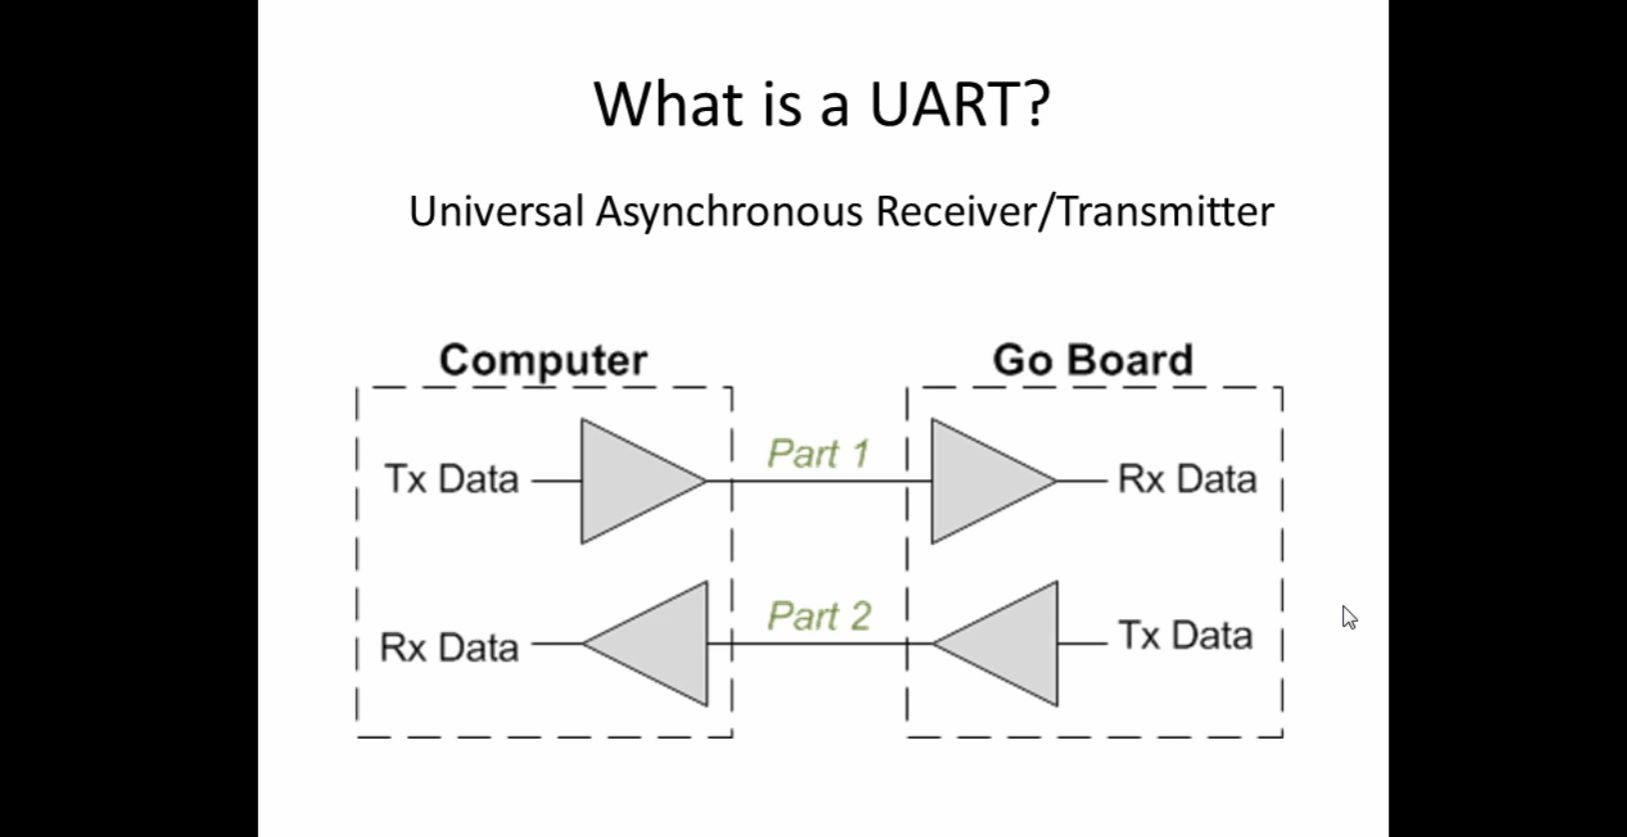 |
| Project 8 – UART Transmitter | Part 2 – Transmit data from your FPGA to your computer with UART. Allows the computer to send and receive data from your FPGA. | |
| Project 9 – VGA Introduction | VGA is a display interface that predated HDMI. It’s a simple interface that allows the Go Board to send image data to any monitor. Learn the basics of how it works. | 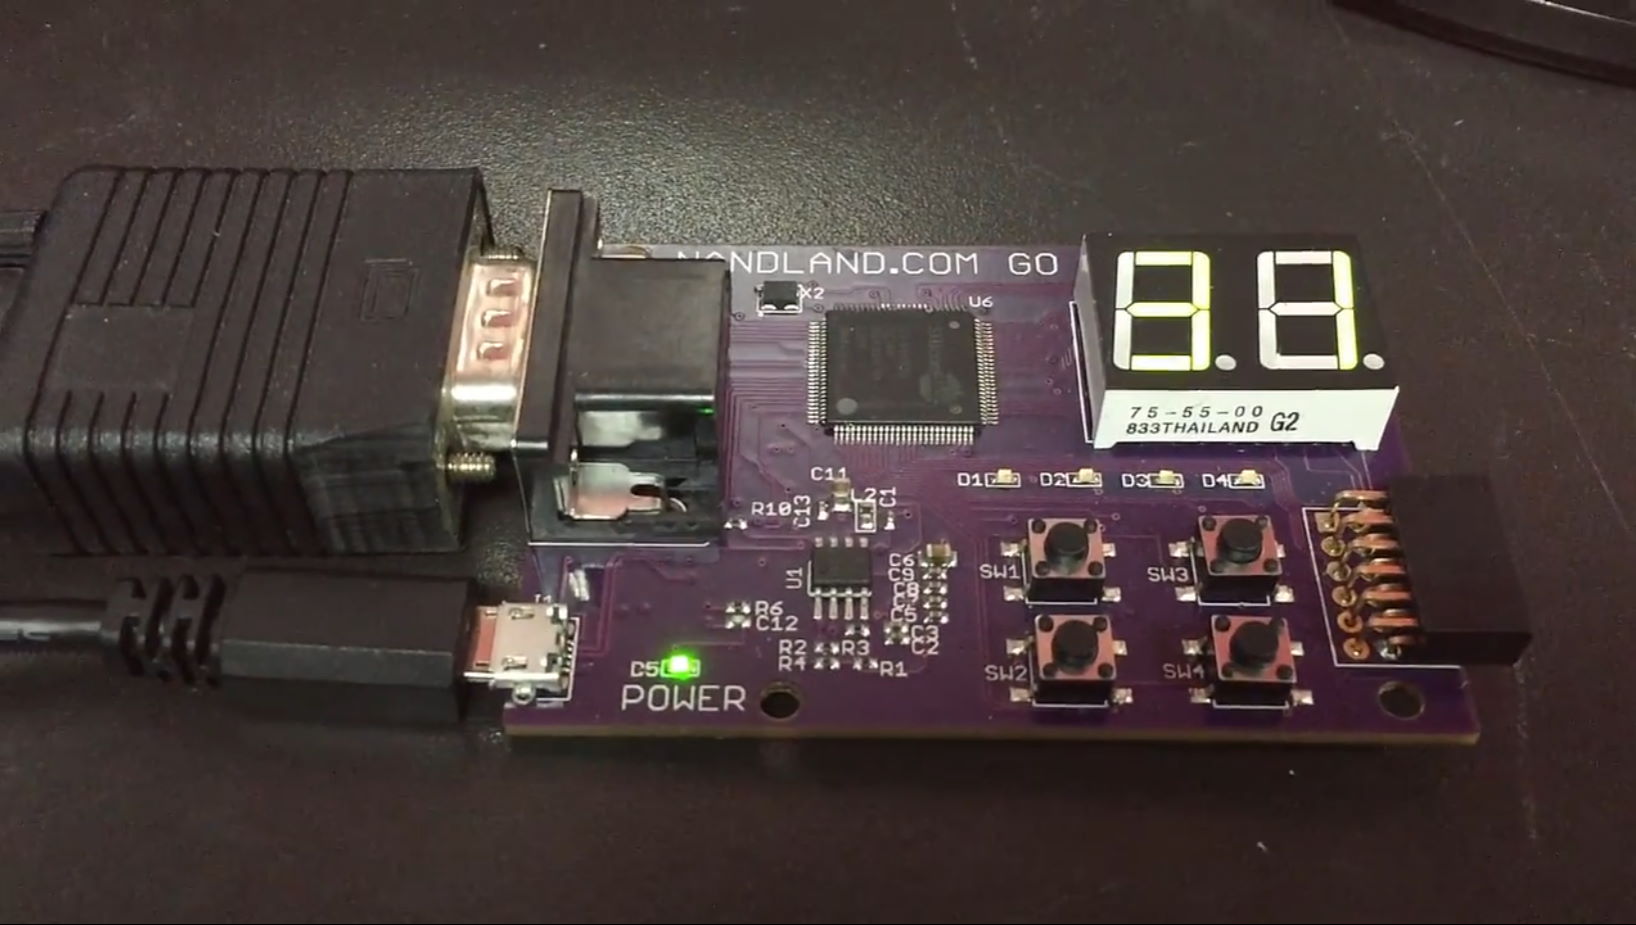
|
| Project 10 – PONG | Play the classic arcade game PONG using the Go Board! The buttons control the paddles and the game is played on a monitor using the VGA port. Combines everything we’ve learned into a very fun project! | 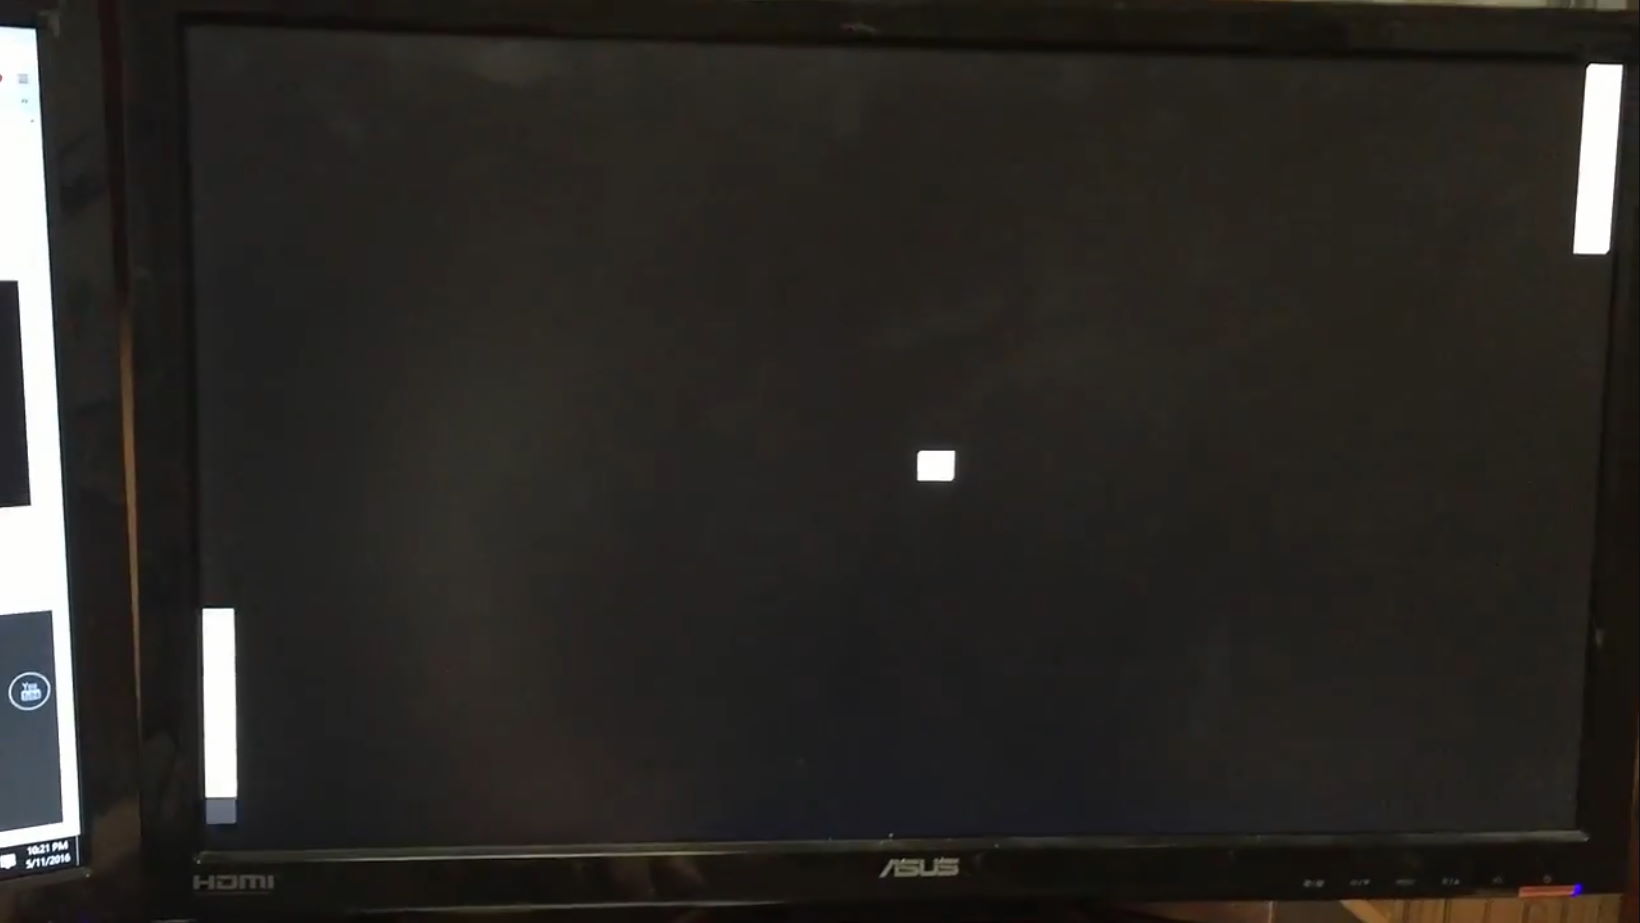 |